
Table of Contents
ToggleIntroduction
Crypto trading can be exciting, but making consistent decisions in such a fast-moving market is not always easy. After spending time studying charts and testing different approaches, it becomes clear that a profitable crypto trading strategy is not about finding a setup that wins every time. It is about having clear rules and following them with discipline.
A good strategy starts with understanding the market before entering a trade. This means looking at the trend, market structure, support and resistance, price action, and useful indicators before deciding whether a setup is worth taking.
In this guide, we will look at 7 profitable crypto trading strategies that work and explain how they can be applied to real trading situations. The focus is on finding higher-probability setups, controlling risk, and avoiding emotional decisions rather than promising guaranteed profits.
What Is a Crypto Trading Strategy?
A crypto trading strategy is a clear set of rules that guides when to enter, manage, and exit a cryptocurrency trade. Instead of buying or selling based on a sudden price move, traders use a strategy to analyze the market and make decisions based on predefined conditions.
A good strategy connects market analysis with risk management. It can include tools such as market structure, support and resistance, price action, moving averages, RSI, volume, and other indicators to identify potential trade setups.
The important part is consistency. A strategy does not need to win every trade to be useful. What matters is whether the rules can identify quality opportunities, limit unnecessary losses, and maintain a sensible risk-to-reward relationship over a series of trades.
What Makes a Crypto Trading Strategy Effective?
An effective strategy should answer five basic questions before a trade is opened:
- What is the current market trend?
- Where is the potential entry?
- What confirms the trade?
- Where should the stop loss go?
- Where should the profit target be?
Having these answers before entering a position removes much of the guesswork from crypto trading. It also makes it easier to review your trades later and identify what is working and what needs improvement.
The goal is not to predict every Bitcoin or altcoin move correctly. The goal is to build a repeatable process that gives you a logical reason to trade and a clear reason to stay out of the market.
My Crypto Trading Strategy at a Glance
Most traders look for the perfect indicator, but that is not where a profitable crypto trading strategy begins. Before opening a trade, I want to know one thing first: does the market actually give me a reason to trade?
That question changes the entire approach. Instead of chasing every breakout or reacting to every green candle, the strategy waits for a specific combination of market structure, key price levels, and confirmation. When those pieces do not line up, there is no trade.
The interesting part comes next. A chart can look perfect and still produce a losing trade, which is why the crypto trading strategy does not stop at finding an entry. The stop loss, target, position size, and risk must all make sense before the trade is placed.
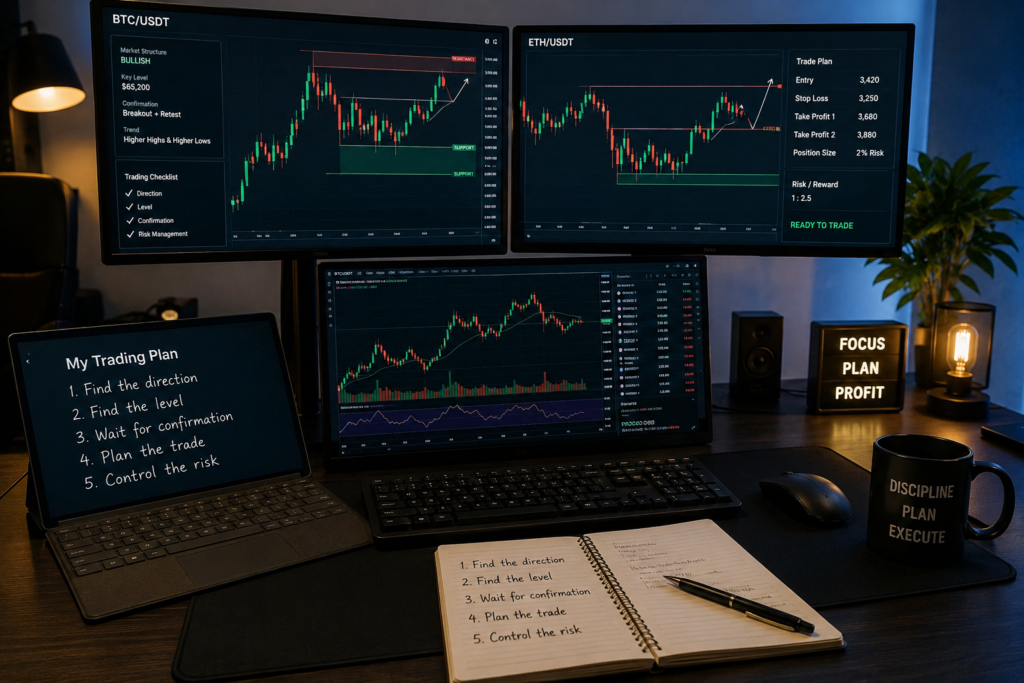
The complete process is built around five decisions:
- Find the direction: Is the market bullish, bearish, or ranging?
- Find the level: Where is price most likely to react?
- Wait for confirmation: What tells us the setup is actually developing?
- Plan the trade: Where is the entry, stop loss, and target?
- Control the risk: Is the potential reward worth taking the risk?
This is what turns a collection of indicators into a profitable crypto trading strategy. In the sections ahead, we will break down each step and show how the pieces work together to find higher-probability setups.
Step 1: I Start With Market Structure
Before I look for an entry, I first ask where the market is actually heading. In crypto trading, price rarely moves randomly for long. It usually creates a pattern of higher highs and higher lows in an uptrend, or lower highs and lower lows during a downtrend. When neither side has clear control, I treat the market as ranging rather than forcing a trade.
I start with the higher timeframes because they give me the bigger picture. A bullish structure on the 4-hour chart, for example, makes me more interested in buying pullbacks than chasing short positions. If the structure turns bearish, my focus changes with it.
I also pay close attention to structure breaks. When price breaks an important high or low and holds beyond it, that can signal a shift in momentum. But I do not enter simply because a level breaks. I want to see how price behaves afterward.
This first step keeps my crypto trading decisions simple: identify the trend, understand who controls the market, and only then start looking for a setup.
Step 2: I Identify the Main Trend
Once I understand the market structure, I zoom out and identify the main trend. This step keeps me from taking trades that fight the broader direction. I am not trying to predict every short-term move. I simply want to know whether buyers, sellers, or neither side has the stronger position.
I compare price action across multiple timeframes. If the higher timeframe shows higher highs and higher lows, I consider the market bullish. If price continues making lower highs and lower lows, I treat the trend as bearish. When price moves sideways between clear boundaries, I stay patient because a ranging market can produce misleading signals.
For my crypto trading strategy, the main trend acts as a filter rather than an entry signal. A bullish trend makes me more interested in buying meaningful pullbacks, while a bearish trend makes me look for selling opportunities after confirmation.
The goal is simple: trade with the dominant direction instead of constantly trying to predict a reversal. Once the trend is clear, I move to the next step and look for the key price level where the market could react.
Step 3: I Mark Important Support and Resistance
After identifying the trend, I mark the price areas where the market has previously shown a strong reaction. These support and resistance zones help me understand where buyers or sellers may become active again.
I do not treat these levels as exact lines. In real crypto trading, price can move slightly above or below a level before reversing. That is why I usually mark a zone rather than expecting price to react at one precise number.
For support, I look for areas where buyers stepped in and pushed price higher. For resistance, I watch regions where selling pressure previously stopped an advance. Previous swing highs, swing lows, consolidation areas, and strong breakout points can all become useful reference zones.
The key is to avoid covering the chart with dozens of levels. I focus only on the areas that matter to the current setup.
Once these zones are marked, I can ask a much better question: What is price doing as it approaches an important level? That leads directly to the next part of my strategy, where I wait for confirmation instead of entering too early.
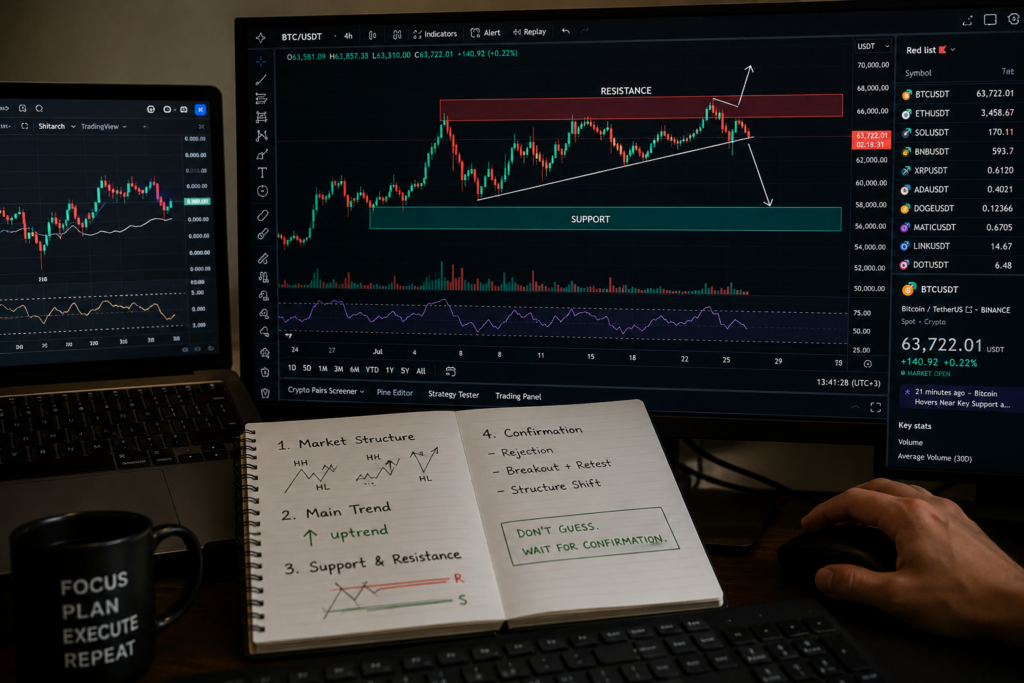
Step 4: I Wait for Price Action Confirmation
Finding the trend and marking a strong level does not mean I enter immediately. This is where I let price action tell me whether the setup is actually worth taking.
When price reaches my support or resistance zone, I watch how it behaves. I look for signs such as a strong rejection, a breakout followed by a retest, or a clear shift in short-term structure. These signals help me distinguish a genuine reaction from a temporary move that could quickly reverse.
For my crypto trading approach, patience matters here. I do not buy simply because price touches support, and I do not sell just because it reaches resistance. I want the market to show me that buyers or sellers are actually stepping in.
Sometimes the best confirmation is no confirmation at all. If price moves through my level without giving a clean setup, I simply stay out.
The goal is not to catch every move. I want the market to confirm my idea before I put capital at risk.
Step 5: I Use Indicators as Confirmation
Indicators come after price action in my process. I do not use them to decide where the market must go. Instead, I use them to support what I am already seeing on the chart.
For example, I may use RSI to understand momentum or spot when price is becoming stretched. A moving average can help me judge whether the broader momentum supports my trade idea. Volume can also add useful context when price breaks an important level.
The key is keeping things simple. Adding five or six indicators does not automatically make a crypto trading setup stronger. In fact, too many signals can create confusion and make me hesitate when the chart is giving a clear message.
My rule is straightforward: price action creates the setup, while indicators help confirm it. If the chart shows a strong opportunity but the indicators disagree, I would rather wait than force the trade.
This extra layer of confirmation helps me filter weaker setups and focus on trades where multiple pieces of evidence point in the same direction.
Step 6: My Crypto Trade Entry
Once the trend, key level, price action, and confirmation all line up, I finally look for my entry. This is where I stop analyzing and start executing the plan I already built.
I do not enter simply because price reaches a support or resistance zone. I want the confirmation candle or structure shift to give me a clear reason to take the trade. Depending on the setup, I may enter after a rejection, a confirmed breakout, or a retest of the broken level.
My crypto trading entry also needs to make sense from a risk perspective. Before clicking buy or sell, I already know where my stop loss will sit and where I expect price to reach. If the entry is too far from the invalidation point or the potential reward is not attractive enough, I skip it.
This keeps my execution disciplined. I am not trying to enter at the perfect price. I am waiting for a price that fits the setup, confirmation, and risk plan.
Step 7: Where I Place My Stop Loss
My stop loss is not an afterthought. I decide where it belongs before entering the trade, based on the point where my original setup would no longer make sense.
For a long position, I usually place the stop below a meaningful support area, recent swing low, or structure point. For a short position, I look above resistance or a relevant swing high. I want enough room for normal market movement without placing the stop so far away that the trade becomes unnecessarily risky.
In my crypto trading strategy, I never move the stop farther away simply because price is moving against me. If the market reaches the level that invalidates my idea, I accept the loss and move on.
The distance between my entry and stop also helps determine my position size. A wider stop means I may need a smaller position to keep the risk under control.
My stop loss has one job: tell me when my trade idea is wrong. Once that point is reached, I do not argue with the market.
Step 8: How I Set My Take Profit
I set my take profit before entering the trade, so I already know where I plan to exit if the setup works. I base the target on the chart rather than choosing a random percentage just because it sounds attractive.
The first thing I look for is the next meaningful support or resistance zone. If I am buying, that could be a previous swing high or resistance area. If I am selling, I look toward a relevant support zone where buyers could step in.
I also compare the potential reward with the amount I am risking. A setup may look technically strong, but if the target is too close to the entry, the trade may not justify the risk. This is an important part of my crypto trading process.
Sometimes I use one target, while other setups allow me to take partial profit and let the remaining position run. The decision depends on the market structure and momentum.
My goal is not to squeeze every possible dollar from a trade. I want a realistic target that fits the chart and gives the trade enough room to make sense.
Step 9: My Crypto Risk Management Rules
| Risk Management Rule | How I Apply It |
|---|---|
| Risk per trade | I keep the amount I can lose on one trade small relative to my total account. |
| Stop loss | Every trade has a predefined stop loss based on market structure. |
| Position size | I adjust my position size according to the distance between entry and stop loss. |
| Risk-to-reward | I look for setups where the potential reward justifies the amount being risked. |
| No revenge trading | A losing trade does not give me a reason to immediately open another position. |
| No overtrading | If there is no clean setup, I stay out instead of forcing an opportunity. |
| Leverage control | I avoid excessive leverage because it can magnify both profits and losses. |
| Daily loss limit | If I reach my predefined loss limit, I stop trading for the day. |
| Plan before entry | Entry, stop loss, target, and position size are decided before I place the trade. |
| Accept the loss | A controlled loss is part of trading. I do not move my stop simply to avoid taking it. |
Step 10: When I Avoid Taking a Trade
| Situation | What I Do |
|---|---|
| Trend is unclear | Stay out and wait for direction |
| No strong support or resistance | Wait for a meaningful level |
| Price action gives no confirmation | Do not enter |
| Risk-to-reward is poor | Skip the setup |
| Stop loss would be too wide | Reduce position or avoid |
| Price has already moved sharply | Avoid chasing |
| Too many conflicting signals | Wait for clarity |
| I feel emotional or impatient | Take a break |
Example of My Crypto Trading Setup
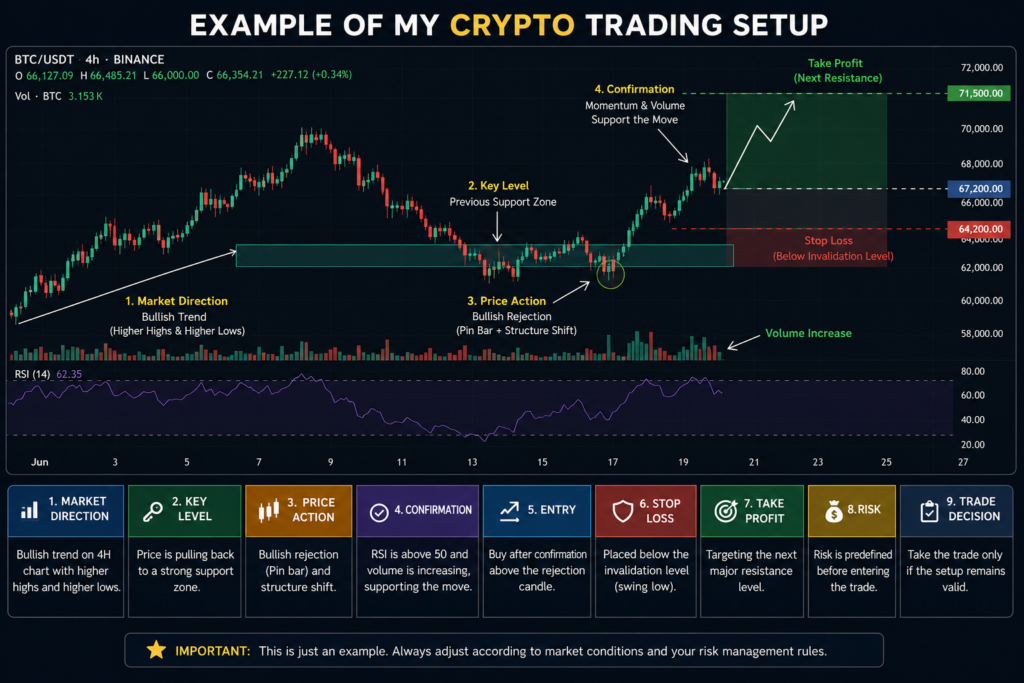
Here is how I put all the steps together when I find a potential trade. I start with the higher-timeframe direction and then move down to the area where I expect price to react. I do not enter just because the setup looks attractive. Every part needs to support the same trade idea.
For example, imagine Bitcoin (BTC) is showing a bullish structure on the 4-hour chart, with higher highs and higher lows. Price then pulls back toward a previous support zone. Instead of buying immediately, I wait for price action to show a rejection or a bullish structure shift. If volume and momentum also support the move, I begin planning the entry.
| Part of My Setup | Example |
|---|---|
| Market Direction | Bullish |
| Key Level | Previous support zone |
| Price Action | Bullish rejection and structure shift |
| Confirmation | Momentum and volume support the move |
| Entry | After confirmation |
| Stop Loss | Below the invalidation level |
| Take Profit | Next major resistance |
| Risk | Predefined before entry |
| Trade Decision | Take the trade only if the setup remains valid |
The important part is that I am not relying on one signal. My crypto trading setup comes from several pieces working together. If the trend, level, confirmation, entry, and risk all make sense, I have a trade worth considering. If even one major piece is missing, I am comfortable walking away.
Conclusion
A strong crypto trading strategy is not about finding a perfect indicator or predicting every market move. For me, it is about having a clear process and following it consistently.
I start by understanding the market structure and identifying the main trend. Then I mark important support and resistance areas and wait for price action to confirm that a potential setup is developing. Indicators only add confirmation. Before entering, I already know my entry, stop loss, take profit, position size, and acceptable risk.
Just as importantly, I know when not to trade. If the market is unclear, the setup is rushed, or the risk does not make sense, I stay out.
No strategy wins every trade. What matters is building a repeatable process that keeps losses controlled and prevents emotional decisions from taking over. My goal is not to trade more. My goal is to trade better when the right opportunity appears.
Frequently Asked Questions
1. What should I check before entering a crypto trade?
Start with the bigger picture rather than jumping straight to an entry. Check the market structure, identify the dominant trend, mark important price zones, and then wait for price action to confirm the setup. This creates a process where the entry is the final decision, not the starting point.
2. Is support and resistance enough to build a crypto trading strategy?
Support and resistance can provide useful areas of interest, but they should not be treated as automatic buy or sell signals. Price can break a level, briefly reclaim it, or move through it before reversing. Combining key levels with trend direction and confirmation can create a more structured approach
3. Should I enter as soon as price reaches my support zone?
Not necessarily. A level tells you where to pay attention, not necessarily when to enter. Waiting for rejection, a structure shift, or another clear confirmation can help avoid entering during a level breakdown.
4. How can I avoid chasing a crypto breakout?
Instead of buying immediately after a large candle, wait to see whether the breakout holds. A retest of the broken level can sometimes provide a more controlled entry than chasing the initial move. If price never gives a suitable setup, missing the trade is better than forcing one.
5. How do I know if my stop loss is in the wrong place?
A stop loss should be connected to your trade thesis. If your setup depends on a particular support or swing low holding, placing the stop beyond the point where that idea becomes invalid can make more sense than choosing an arbitrary percentage. Stop placement also needs to account for the volatility of the asset
6. Should position size change when the stop loss is wider?
Yes. Position sizing and stop distance work together. If the technical setup requires a wider stop, reducing the position can keep the amount at risk within your predefined limit. This is more useful than using the same position size on every trade regardless of market conditions.